
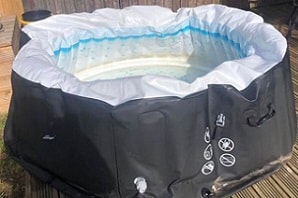
 It’s a moment we dread happening. That moment you go to use your inflatable hot tub and you find the walls are soft and sagging. That moment you realise your hot tub has somehow developed an air leak.
But don’t panic, because we’re going answer a question we get asked every now and then: How do you fix a puncture in an inflatable hot tub?

My quick answer, if you’re in a hurry: Use Hydrotools Repair Kit (available on by clicking Amazon here), which can even be used to repair problems which are under the water in your hot tub.
If you need detailed advise on exactly how to repair that pesky puncture, however, then read on my friend and we’ll cover everything you need to do, step-by-step.
Make Sure It Is An Air Leak
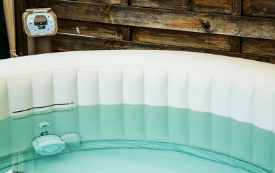
Inflate your hot tub and leave it overnight to check if it really does have a puncture.
First off, make sure that the hot tub really does have an air leak! To do this, inflate your hot tub to its normal inflation level, and leave it for at least 6 hours (overnight if possible).
When you go back, if the walls are nice and firm then you’re in luck. It might be that your hot tub lost some air through natural expansion and contraction of the vinyl, due to temperature changes, or maybe it just lost air over time.
However, if the walls are noticeably softer, then you have a puncture and you need to take speedy action.
How To Locate The Air Leak In Your Inflatable Hot Tub
The first thing you need to do is find exactly where the puncture is.
Before you start inspecting the walls of your hot tub for the puncture, though, check to see if it’s a leaky air valve.
Does Your Hot Tub Have a Leaky Air Valve?
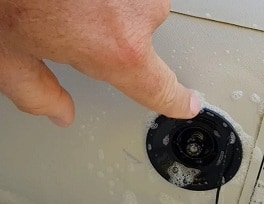
The first place to check is the air valve and the seal around the valve.
Take a small spray bottle and half fill it with water. Add a squirt of liquid dish soap or a few squirts of liquid hand soap. Shake the bottle well until the water and detergent are thoroughly mixed.
Now wipe clean the vinyl seal around the valve and spray some of the water and detergent mix all over the vinyl seal and the valve. Look closely to see if the mixture starts bubbling.
If it does, then you have found the air leak.
If it’s the valve that appears to be leaking, then the first thing to do is tighten the valve, just in case it has worked loose through all the comings and goings associated with everyday use. Refer to your User Manual on how to do this.
If the air leak seems to be coming from the vinyl seal around the valve, then you need to apply a repair patch. To find out how to do this, you can skip to our section: How To Apply A Puncture Repair Patch To An Inflatable Hot Tub.
If you don’t see any bubbling, however, then your valve and the seal around it are fine. In which case, there are two possibilities:
- the puncture is inside your hot tub, underwater
- the puncture is on the inner wall above the water line or on the outside wall of the hot tub.
How To Find an Underwater Puncture
TOP TIP #1: It’s a good idea to get hold of a pen or marker that will write underwater, as you may want to mark the puncture area if it’s on the inside wall under the water line. You can find All-Write Wax Pencils fairly cheaply at good stationery stores or here at Amazon.
Fortunately, if the puncture is under the water in your hot tub, then it’s going to be pretty easy to find.
Remove everything from your hot tub and wait for the water to be still.
Firstly, turn off the motor and bubble jets. Be sure to remove anything that you might have floating in the hot tub, such as a drinks tray or Bluetooth speaker. Also, if you have installed seats or submersible lights, remove these as well. You really want everything out of the tub, so you have a clear view of the inner walls. Then wait for 5-10 minutes until the water is still.
Now lean over your hot tub and look closely for a small stream of bubbles coming off the vinyl liner of your inner walls.
These bubbles can be tiny, so you’ll need to take your time as you observe all around the inside of the tub.
If you do see bubbles like this, then you have found a leak.
Using your non-writing hand, place the tip of your forefinger over where you think the bubbles are coming from and press firmly but not too hard.
See if the bubbles stop. If they do, you have successfully located the puncture. If you can still see the bubble stream, however, then move your fingers gently around until the bubble stream stops and you have exactly located the puncture.
When you’ve done that, take your wax pencil and draw a small circle around the location of the puncture. (See why you used your non-writing hand to locate the puncture?)
TOP TIP #2: If you do find a leak in the inner wall, don’t stop there. Look around the area where the puncture is, in case there is another hole nearby. Also, look around the rest of the inside of the hot tub for any other bubble streams. You don’t want to fix the first leak and then find your hot tub still keeps deflating!
How To Find a Puncture On The Outer Wall Of Your Hot Tub
If there isn’t a puncture under the water in your inflatable hot tub, then you have a slightly harder job of locating it either on the inner wall above the water line or on the outer wall. It’s not that you need lots of equipment or know-how, it’s just that it could take some time to locate the leak.
To do this, you’re going to need some more of that water-and-soap mixture in the spray bottle that you used around the air valve.
First off, give the walls of your hot tub a wipe down and then inflate the hot tub until it’s good and firm.

Look for the soapy mixture to start bubbling and that’s where the puncture is.
Now, working your way around the walls, spray a little of the soapy mix from the bottle onto a small area of the wall and look for any bubbling.
Keep going until you spot some bubbling, which shows you where there is an air leak.
Wipe off the solution and spray it again, just to double-check. Then, using the forefinger on your non-writing hand, place the fingertip over where the hole is. This should stop the bubbling. If it doesn’t, slightly move your fingertip around until the bubbling stops and you find the puncture hole.
Dry the area around the puncture and mark around the location with a waterproof marker or a piece of chalk.
Again, if you have the time (or preferably some helpers), I suggest checking the rest of your hot tub to see if there are any other punctures.
Once you’re happy that you have found your leak, it’s time to repair the vinyl.
How To Apply A Puncture Repair Patch To An Inflatable Hot Tub

You’re going to need a good vinyl repair kit, such as the one I mentioned at the start: Hydrotools Repair Kit. Some people use Gorilla Waterproof Patch and Seal Tape, with mixed results.
Whichever repair kit you choose, I strongly recommend getting one which has self-adhesive patches rather than a tube of glue that you spread on and then apply the patch, as the results can be a little messy.
To start with, wipe the area around the puncture. Use alcohol wipes if it is not underwater and wait a few minutes for the vinyl to air-dry.
Then cut the patch so that it extends at least 1 inch in each direction beyond the puncture hole.
TOP TIP#3: Round off the corners of the patch with scissors to make a circular or oval shape. This prevents the corners catching and lifting off as you use your hot tub over time.
I always like to place the patch over the hole without taking off the backing first. This gives me a visual of exactly where it’s going to go and helps with the very next step.
Now, remove an inch or so of the backing on the patch and press it firmly onto the vinyl about an inch from the hole. Then slowly peel off the rest of the backing, and press the patch firmly into place. Use a backwards and forwards motion with your forefinger from one edge to the other as you press down, to prevent any air bubbles being trapped under the patch.
When the patch is in place, rub your thumb over the entire patch firmly and vigorously for a couple of minutes, to really smooth down the patch and help bond the patch to the vinyl.
Wait Before You Try Out The Hot Tub
You need to wait before you use the hot tub, to allow for full adhesion of the patch. For the Hydrotools Repair Kit, you need to wait 24 hours. You’ll have to check the instructions of any other repair kit that you use, although whichever repair kit I was using, I’d still wait 24 hours.
After the time has elapsed, and before you use your hot tub, check the tub is fully inflated and use the soapy mixture method one final time to check that you have successfully sealed the puncture.
If there are no bubbles at the edge of the patch, then you’re good to go. If, however, you notice a bubble or two escaping from the edge of the patch, then repeat the repair process, using a rectangular patch to cover that edge of the first patch. Remember to round off the corners of this patch to prevent the corners lifting.
How To Prevent Punctures To Your Inflatable Hot Tub
If you do have a puncture to your inflatable hot tub, then you have been extremely unlucky. That’s because quality inflatable spas are made of very tough vinyl these days.
Many of our articles such as 8 Tips For Setting Up Your Inflatable Hot Tub give good advice on how to minimise the risk of getting a puncture, and are worth checking out.
It is always a good idea though to reduce the risk of getting a puncture through practising good inflatable hot tub use:
- Be sure to site your hot tub away from anything that could puncture or tear the outer wall.
- Keep cats away from the hot tub, in case they see it as a giant scratch pad put there specially for them!
- Make sure that everyone who uses your hot tub is aware of the need to take off all jewelry before they get in.
- Be sure that if your kids use the tub, they aren’t getting in with toys or objects that have sharp edges or anything that could puncture or scratch the vinyl.
- If you’re going to have a drink in the hot tub, use specially-manufactured plastic glasses that won’t damage the surface.
- Remove anything that falls into the hot tub while you’re in it, especially twigs, leaves and even stones.
- Always put the cover on the hot tub as soon as you get out, to make sure nothing can fall in. (This is good and safe practice at all times, for many reasons).
- If you pack away your hot tub at the end of summer, then make sure you do it correctly so that the vinyl doesn’t rip or puncture in storage – you may want to check out our article How To Pack Away Your Inflatable Hot Tub for great advice.
In a way, I truly hope you never need to read this article! But if you did need to come here, I hope it has helped you repair the puncture so that you can get back to fully enjoying your inflatable hot tub.
Thanks for reading.
